Disclosure: This post may contain affiliate links, meaning I get commission if you decide to make a purchase through my links, at no cost to you. Please read my Affiliate Disclosure for more information.
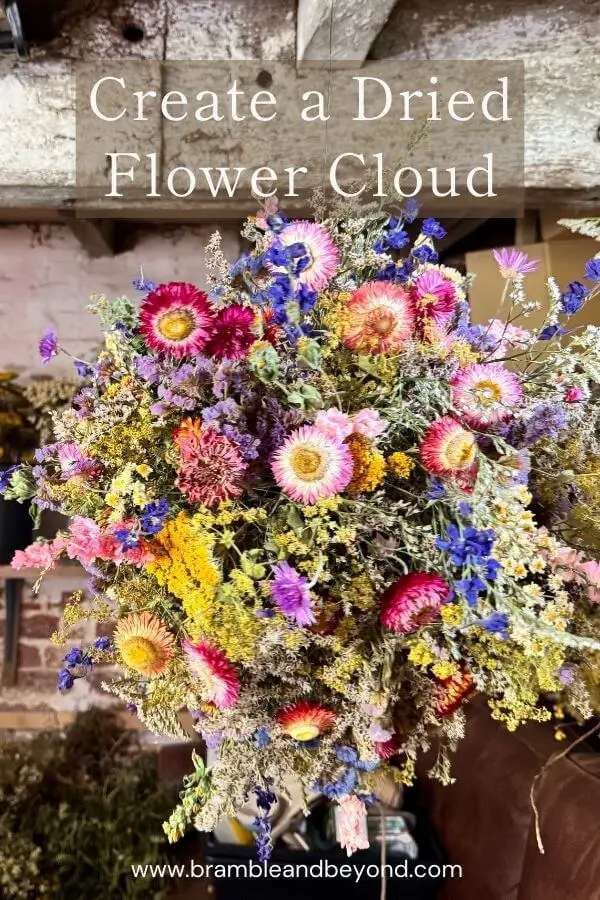
Imagine bringing a burst of summer into your home in the depths of winter. That’s exactly what a dried flower cloud – or flower ball or floral orb – can do. It looks magical, almost otherworldly, but the best part? You don’t need floristry training, just a handful of dried flowers, a bit of chicken wire, and the willingness to have a go.
In this post, I’ll walk you through a simple DIY flower cloud tutorial you can follow at home. It’s lighter, simpler, and far more achievable than it first appears.
Why Make a Dried Flower Cloud?
A dried flower ball is a brilliant way to:
- Bring seasonal beauty indoors, even long after the garden has faded
- Use up dried blooms you’ve saved from the summer
- Create a lightweight hanging decoration that looks impressive but takes very little skill
It’s the kind of project that looks far harder than it is – perfect for beginners or anyone short on time.
What You’ll Need
- A ball of chicken wire (this forms the lightweight frame)
- A bamboo cane (for stability and hanging), optional
- Wire or strong string (to suspend your flower ball). Fishing line works beautifully if you want an “invisible” look
- A mix of dried flowers — ideally some base fillers, colourful feature blooms, and a few delicate highlights
Tip: Dried flowers are wonderfully light, so the finished orb won’t be heavy. That means you can hang it almost anywhere indoors.
Step 1: Build Your Frame
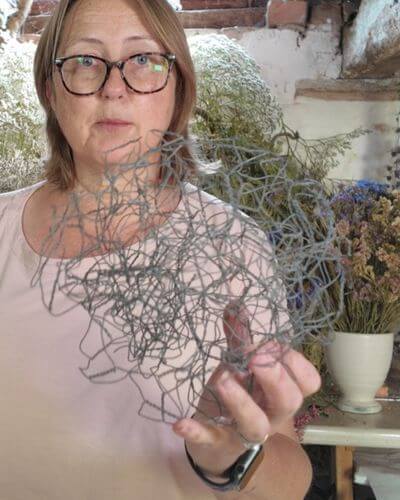
Start by shaping your chicken wire into a ball. This is your base mechanics. If it is a large creation, push one or two bamboo canes through the middle, this gives it extra stability so the wire won’t twist or sag. Attach your hanging wire (or fishing line if you’d like it to look invisible) to the cane. If you are only creating a small ball then the cane is probably overkill and you can attach your hanging wire to the chicken wire itself. Once it’s suspended, you’re ready to begin adding flowers.
It is worth noting that the finished piece could be twice the size of your chicken wire mechanics, so bear this mind when creating your base.
Step 2: Add the Base Layer of Flowers
Think of the base layer as camouflaging the mechanics. Cut your dried flowers into smaller stems so they tuck in easily. Good options include limonium tataricum, statice, feverfew, and achillea and maybe a bit of greenery such as bracken. Anything with a bit of spread that can hide the chicken wire without looking heavy.
You don’t need to cover every gap perfectly at this stage; just soften the structure and give yourself a natural-looking foundation.
Step 3: Build the Feature Flowers
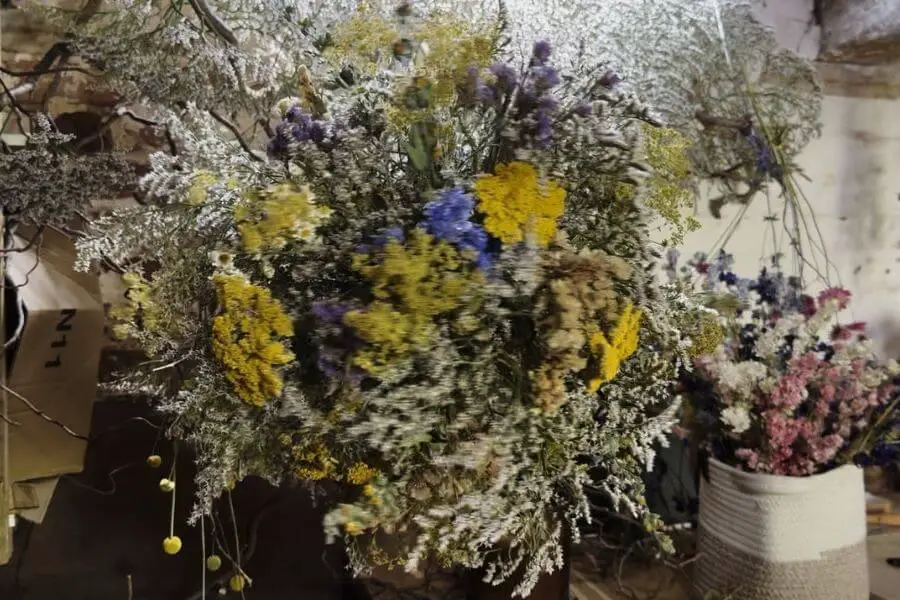
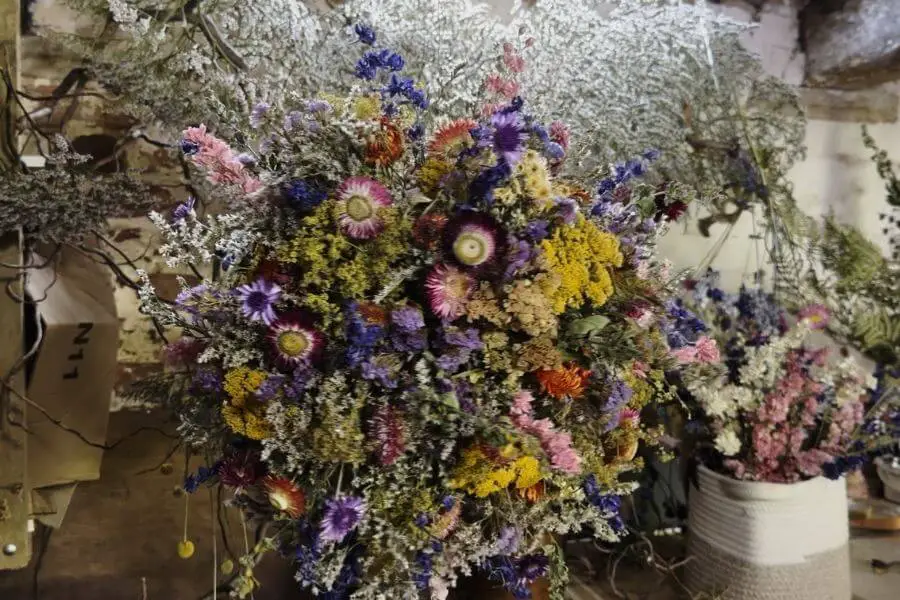
Next comes the fun part – colour and drama. The feature flowers will be the stars of your design. They are the blooms that catch the eye and bring your flower ball to life. Try strawflowers, zinnias, or larkspur.
Trim the stems at an angle so they slip more easily into the wire, and place them where you want them seen. This is where your DIY flower cloud really begins to take shape.
Step 4: Finish With Highlights
Finally, add a scattering of smaller, lighter highlight flowers to give your cloud that airy, organic feel. Think of these as sparks of joy – little bursts of colour and movement that lift the whole piece and stop it looking too flat and compact.
At this point, step back and look at your flower orb from every angle. Keep it loose and wild rather than packed too tightly. The beauty of a flower cloud lies in its lightness.
Tips for Success
- Keep it light and airy – don’t create the illusion of heaviness with too many of the same flowers.
- Work with what you have – home-dried flowers are perfect.
- A dried flower cloud takes more flowers than you think. my example has probably has more than 200 stems. But if you have lots of variety then it doesn’t seem too overwhelming.
- Adjust the size to your space — a small floral orb can be just as charming as a large installation.
The Finished Dried Flower Cloud
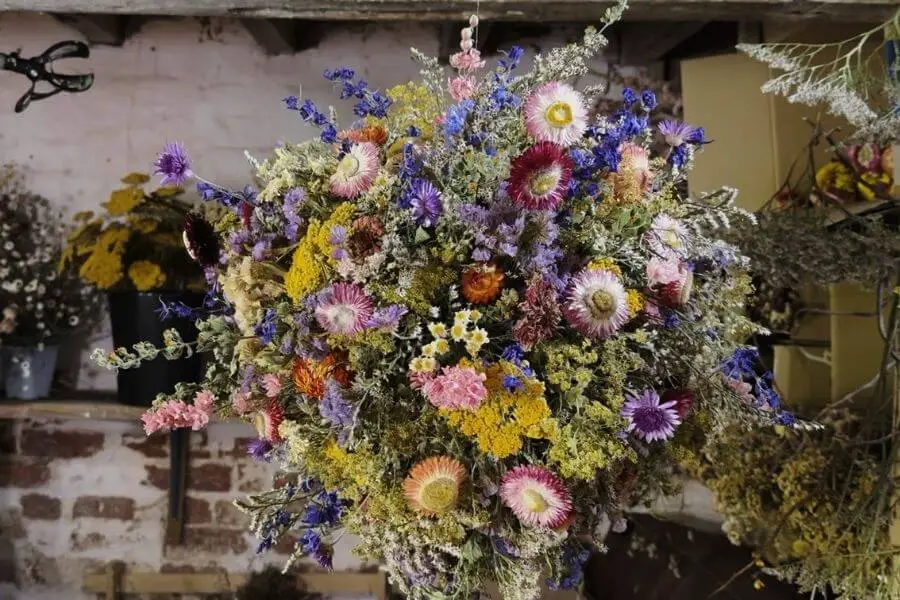
In under an afternoon, you’ll have a colourful dried flower ball that looks like it’s floating in mid-air. Hang it in a hallway, above a dining table, or in any corner of your home that needs a touch of seasonal magic.
The best part? You can adapt the size and colours of your flower clouds to whatever you have on hand and the space you want it to live in. A smaller sphere makes a sweet accent, while a larger one can be a show-stopping centrepiece.
Watch the Full Tutorial
This is one of those projects that looks far more complicated than it is. Once you’ve made one, you might just find yourself dreaming of bigger, more organic flower clouds.
👉 If you’d like to see the process in action, watch the full video tutorial here: How to Make a Flower Cloud (Even If You’ve Never Tried Before).
And if you’d love more seasonal flower ideas, be sure to join my free hub, The Flower Files – packed with resources to help you grow and create with confidence.

