Disclosure: This post may contain affiliate links, meaning I get commission if you decide to make a purchase through my links, at no cost to you. Please read my Affiliate Disclosure for more information.
Gardening is a journey of love, patience, and occasional heartbreak—especially in the UK, where the weather is unpredictable at best. If you’re a fan of dahlias, you know how rewarding these vibrant, showy blooms can be throughout the summer. But as the colder months creep in, the challenge becomes how to ensure your dahlias survive the winter.
Fear not!
Storing dahlia tubers over the winter can be a straightforward process, even for the novice gardener. Whatever weather and soil conditions you might be facing, following these five easy steps will keep your dahlia tubers safe and ready to dazzle again next summer.
How to Ensure Your Dahlias Survive the Winter
Dahlias, although they are tubers, can be treated as tender perennials. This means if you can provide enough cold protection to your tubers, you could keep them in the ground. This usually means placing a really thick mulch layer over the ground to provide some extra protection. This not only saves storage space but also means you don’t have the hassle of digging up and then re-planting.
However, I’ve never left my dahlias in the ground over winter. While we don’t often have really cold winters here, we do have damp ones, and I’ve got clay soil. Dahlia tubers absolutely loathe sitting in damp conditions—it’s a recipe for disaster that can cause more damage than the cold and will likely lead to rotting tubers. That’s why I always lift and store my dahlias.
It’s not just about protection, mind you; it gives me a brilliant opportunity to give them a thorough once-over for any signs of disease, divide them to create more tubers, and get a head start on the spring by planting them earlier. It’s a bit of extra work, sure, but it’s worth it for the peace of mind and the promise of a garden bursting with dahlias come summer!
If you want to do the same, then follow these simple steps for thriving dahlias next year.
Step 1: How to Lift and Prepare Dahlia Tubers for Storage
Let’s start with the basics. Do you need to lift your dahlias? In milder UK regions with well-draining soil, you might get away with leaving them in the ground. However, if you’re in an area prone to harsh winters or have heavy clay soil (I fall into this category), lifting is essential to prevent the tubers from rotting.
When to Lift Your Dahlias
The best time to lift your dahlia tubers is after the first frost has blackened the foliage. This signals that the plant has gone dormant, and the tubers have stored up enough energy to get through the winter.
I prefer not to wait until the last minute, as it might mean lifting them in cold, rainy conditions—which isn’t my cup of tea. Instead, I usually choose a pleasant day in mid-October (assuming we haven’t had a frost by then). This approach helps me minimize how damp the tubers are when I lift them, making the whole process of storing dahlia tubers much more enjoyable.
How to Lift and Clean the Tubers
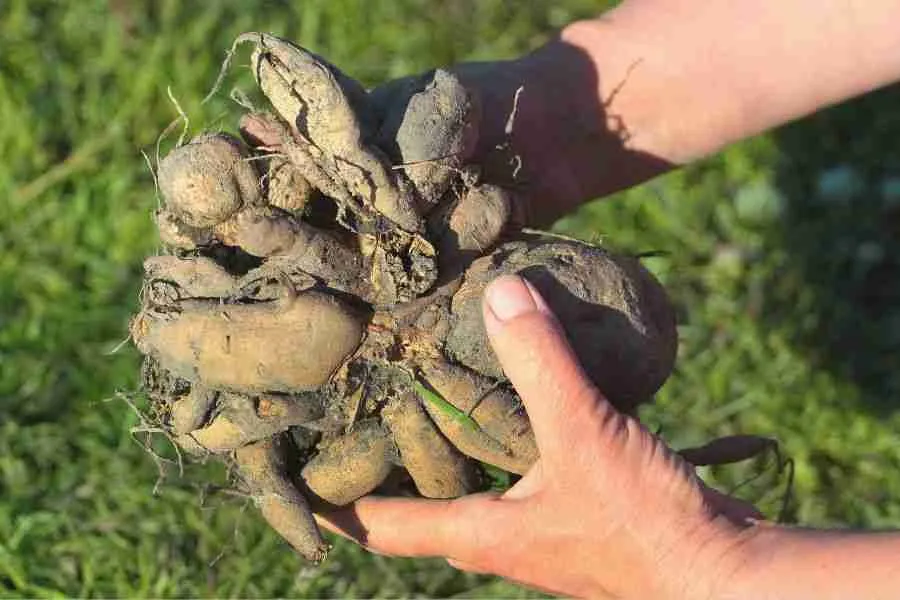
Grab a garden fork and gently dig around the base of the plant, careful not to pierce the tubers. Once you’ve lifted the clump, shake off excess soil.
At this point I reduce down the stems so that they are not too big and unwieldy. They are not needed for next year’s growth, but I like to leave a bit of stem so I have something to hang the label off.
Step 2: How to Cure Dahlia Tubers Before Storing
Now that you’ve got your tubers out of the ground, it’s time to cure them. This process is vital for preventing rot during storage. Without it, all your hard work could go down the drain.
What Is Curing and Why Is It Important?
Curing simply means allowing the tubers to dry out a bit before storage. This step toughens the skin, reducing the risk of rot. It’s like giving your dahlias a chance to harden up before facing the cold, dark months ahead.
The Best Environment for Curing Dahlia Tubers
Find a cool, frost free, dry place where you can lay the tubers out for a few days to a week. An airy shed or garage is ideal, as long as it’s not too damp. Spread the tubers out in a single layer on a dry surface, ensuring they’re not touching each other.
I like to place the tubers upside down, stems facing to the ground. This way any water trapped in the stems can easily drain away.
Make sure you keep a note of which tuber is which, as believe me when I tell you that you won’t remember or recognise them after they have been drying for a few days.
How Long to Cure Dahlia Tubers
I usually leave the tubers to dry for about a week, weather depending. You’ll know they’re ready when the stem cuts have dried over. This typically takes about a week, depending on the humidity levels in your curing area.
Step 3: Choosing the Right Storage Method for Dahlia Tubers
Now comes the tricky part: deciding how and where to store dahlia tubers over the winter. There are several methods to choose from, depending on your available space and materials.
Materials You Can Use to Store Dahlia Tubers
Common materials for storing tubers include used potting compost, sawdust, vermiculite, and even shredded newspaper. The goal is to keep them dry but not completely desiccated—think of it as providing a cosy but breathable blanket for your dahlias.
Choosing the Best Storage Material for Your Situation
- Used Potting Compost: A popular choice because it retains moisture without getting too soggy and doesn’t provide nutrients that will encourage re-growth. Perfect if you’ve got a bit of room in your shed or garage.
- Sawdust: Great for absorbing moisture, but make sure it’s untreated to avoid any chemical nasties.
- Vermiculite: Lightweight and effective at insulating, vermiculite is a go-to for many gardeners. I find this an expensive route, and messy, as those little balls get everywhere!
- Shredded Newspaper: An economical and eco-friendly option, though not quite as insulating as the others.
I have tried many different materials, and really the best is the one you have to hand. Last year I used a mixture of potting compost and animal bedding and it worked well.
I had the worst results by just wrapping them in newspaper, but it was maybe an exceptionally cold winter, which didn’t help.
Labelling Your Tubers
Before you tuck your tubers in for the winter, take a moment to label them. Trust me, come spring, you’ll thank yourself for this. Use a permanent marker on wooden sticks or plastic tags to jot down the variety.
If you’re anything like me, you’ll find it all too easy to forget which tuber is which after a few months. I try to keep the same tuber varieties together but invariably they somehow get mixed up each spring.
Step 4: How to Store Dahlia Tubers
If you’re like many gardeners, space is often at a premium. But don’t worry—small garden spaces don’t have to mean losing your precious dahlias.
Creative Storage Solutions for Small Spaces
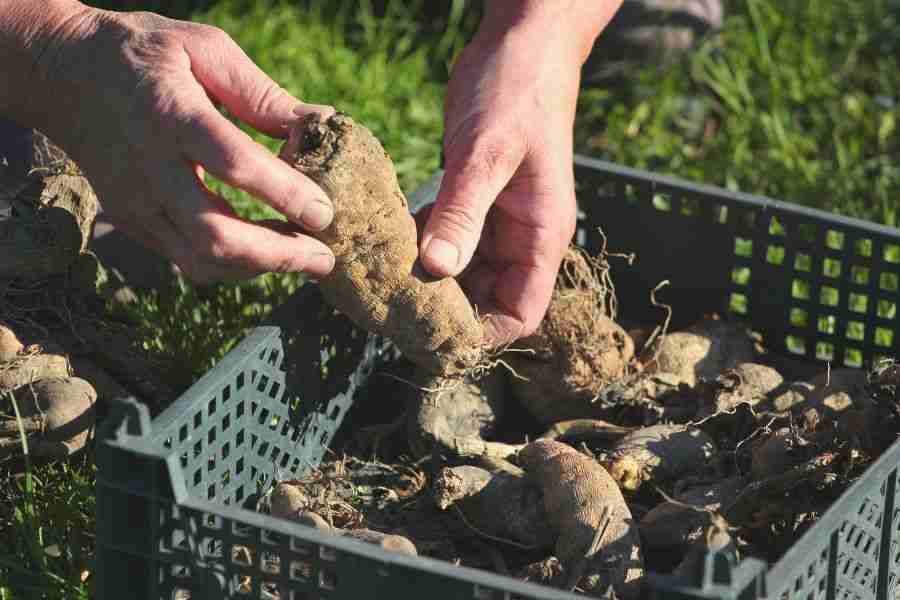
For those of us working with smaller spaces, consider using containers or boxes that can be tucked away, or stacked in a cool dry spot. Cardboard boxes or plastic crates work well as long as they’re not airtight. Drill a few holes for ventilation if needed.
I have seen people simply wrapping their dry tubers in cling film, but I think they may be in warmer climes, such as California. I’m not sure I want to risk it here in the UK.
Finding the Perfect Spot in Your Home or Garden Shed
A cool, frost-free environment is crucial for successful storage. Lofts, sheds or garages can work well. The key is finding a spot that stays between 4-10°C. Too warm, and they’ll dry out; too cold, and they might freeze.
Avoid placing the tubers directly on the ground to prevent dampness from seeping in. Instead, elevate the boxes slightly—even propping them up on a few bricks will do the trick. This allows air to circulate freely.
Monitoring Your Tubers Throughout Winter
Once you’ve stored your tubers, it’s essential to check on them periodically. Every few weeks, pop open the container and give them a once-over. If they seem too dry, lightly mist the packing material. If you spot any rot, remove the affected tuber to prevent it from spreading.
Step 5: Preparing Dahlia Tubers for Spring Planting
As winter draws to a close, your thoughts will naturally turn to spring and getting those dahlias back in the ground. But before you rush out to the garden, a little preparation is needed.
Checking Your Tubers as Winter Ends
In late winter or early spring, take your tubers out of storage. Check for any signs of rot or shrivelling. Healthy tubers should be firm with no soft spots. If they’re looking a bit dry, don’t panic, they will soon recover once they are in soil and watered.
Getting Ready for Planting
Once the weather starts to warm up, you’ll be itching to get started potting them up, but hold on there is no rush. I usually start potting up my dahlia tubers around mid April and keep them in my greenhouse. This way I can take dahlia cuttings from any early shoots, or spilt my dahlia tubers to create more dahlia plants.
Wait until the risk of frost has passed before planting your dahlias outside. For most parts of the UK, late April to early May is ideal.
Many gardeners successfully plant tubers directly into the ground after the last frost (typically mid-May), skipping the potting-on stage. I’m tempted to try this approach next year, as it could save both time and money on potting compost. Plus, it would free up valuable greenhouse space during the busy spring season.
And there you have it—five easy steps to storing your dahlia tubers and ensuring they come back as strong as ever next year. Whether you’re a seasoned gardener or just getting started, these simple steps will help protect your dahlias through the cold, dark winter and have them ready to bloom again in the spring.
Check Out the Video Series
If you’re more of a visual learner or just fancy watching someone else do the hard work, I’ve recorded a two-part series on YouTube that walks you through this process step-by-step. You can find them here: Part 1 and Part 2. Give them a watch, and don’t forget to subscribe for more gardening tips!
As the gardening author Henry Mitchell once said, “Half the interest of a garden is the constant exercise of the imagination.” By carefully storing your dahlia tubers over winter, you’re not just preserving a plant—you’re investing in the future beauty of your garden, ready to surprise and delight you come spring.
So, here’s to keeping those dahlias safe and sound, and to the glorious blooms that await us next season!
Tips for growing your dahlias
- Divide your dahlias: To produce good sized productive dahlia plants, it is a good idea to divide the tuber every few years. If the tuber is too large, then you get increasing amount of foliage and poorer quality blooms.
- Starting your dahlias: From March onwards you can start your dahlias tubers growing in pots in a protected growing space. The space doesn’t need to be heated, but it does need to have light and be protected from frost.
- Propagate your dahlias: Once your potted up dahlias start producing more than 5 new shoots you can take cuttings of any of the extra cuttings, to create new plants that will flower and create a tuber within this growing season.
- Pinch out shoots: Once you have stems that have a few sets of leaves, then pinch out the growing tip. This will encourage the plant to produce more lateral growth and flowering stems.
- Planting: When planting your dahlias, plant out the plants deep enough to cover the tuber. Place the tubers about 15cm (6 inches) deep. Space the tubers/plants about 40cm – 70cm apart. Only plant out once the risk of frost has passed. In the UK this is generally mid May.
- Watering: After planting, water them in well. After the initial watering, I prefer to water all my plants (if I need to water) with a long deep drink, rather than a light consistent watering. I think this encourages the plants to go in search of their own water, making them more drought tolerant.
- Provide support: Dahlias, especially tall varieties, will need staking or other support to prevent them from toppling over under the weight of their blooms. It is best to get this in place before you need it, rather than waiting until it is too late.
- Protect from pests: Avoid chemical pesticides in your dahlia bed. Instead, encourage beneficial insects, try companion planting, use physical barriers, or try homemade, eco-friendly sprays.
- Protect from frost: In the autumn, after the first frost, either cut back your dahlias and mulch heavily to protect the tubers over the winter. Or lift them and store them somewhere cool and dry overwinter.

