Disclosure: This post may contain affiliate links, meaning I get commission if you decide to make a purchase through my links, at no cost to you. Please read my Affiliate Disclosure for more information.
Are you tired of delicate seedlings that never seem to make it past the transplant stage? Do you wish there was a way to give your plants a sturdier foundation to grow from? Then look no further than soil blocks and soil blocking. This innovative seed starting technique is gaining popularity among gardeners and small-scale farmers alike, and for good reason.
In this post, we’ll dive into the basics of soil blocking, explore why it may be a better option than traditional seed starting methods, and provide tips for troubleshooting common issues. By the end, you’ll have the tools and knowledge you need to create a healthy and thriving flower garden.
What is soil blocking?
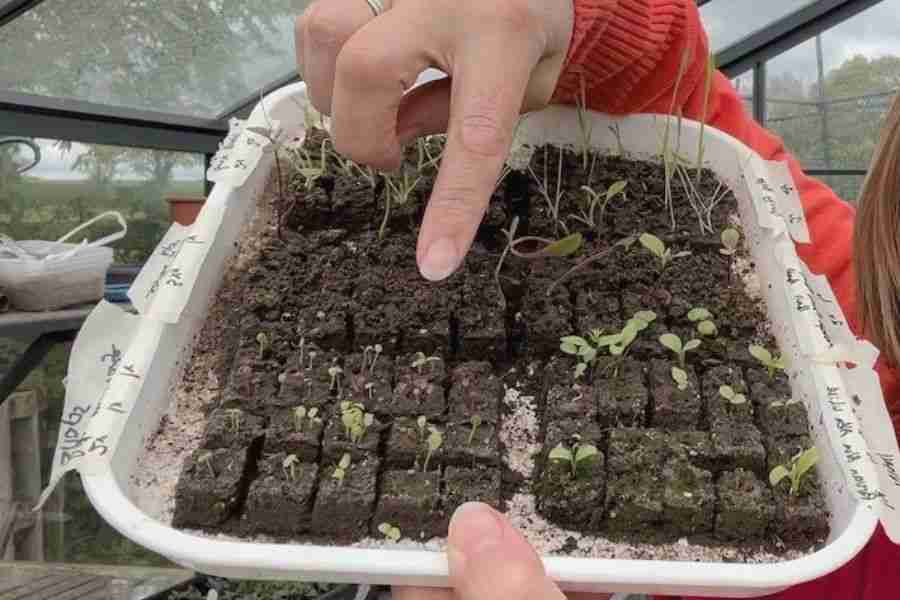
Soil blocking is a seed starting method that involves creating small blocks of soil that serve as the seed bed for your plants. These blocks are made using a soil block maker, which compresses the soil into a cube-like shape, creating a perfect environment for the seeds to germinate and grow.
While traditional seed starting methods often involve planting seeds in individual containers or trays, soil blocking involves planting individual seeds into individual soil blocks. These soil blocks can then be easily transplanted into larger soil blocks or straight into the ground, when the seedlings are of an appropriate size, without disturbing the plant’s delicate roots.
How does soil blocking work?
Soil blocking works by creating a perfect environment for seed germination and root growth. The soil block itself serves as the seed bed for the plant, providing a compact and nutrient-rich environment for the seed to sprout and grow.
Each soil block promotes more robust root growth. When the roots hit the edge of the block, they are automatically air pruned and encouraged to produce a robust root ball with lots of fine roots, rather than one long root. This results in a stronger root system that is better adapted to obtain water and nutrients from the soil.
This improved root system and the ease of moving the soil block make it much easier to transplant the plants in the garden. This helps the plants grow faster and makes them less likely to go into shock after moving.
Overall, soil blocking provides the perfect conditions for seedlings to thrive, resulting in healthier and more successful plants.
Why choose soil blocking over traditional seed starting methods?
Soil blocking offers several advantages over traditional seed starting methods.
Firstly, the compact size of soil blocks allows for more efficient use of space and resources. Because each block contains a single seed, it is unnecessary to sow multiple seeds in a larger container and then thin them out later. This not only saves time and effort but also reduces waste.
In addition, less compost is used to grow the seeds as the soil block per seed area is much less compared to traditional seed sowing trays.
As explained above, soil blocking also promotes more robust root growth. With no container to restrict their growth, the roots are air pruned at the edge of each block. This means the plants produce finer roots, better adapted to obtain water and nutrients. This results in plants that are stronger, healthier, and more resistant to disease and pests.
Another benefit of soil blocking is that it eliminates the need for disposable plastic pots or trays, which can be harmful to the environment. Using soil blocks can reduce your carbon footprint and contribute to a more sustainable future.
Given all these advantages, it’s no wonder that more and more gardeners are turning to soil blocking as their preferred seed starting method.
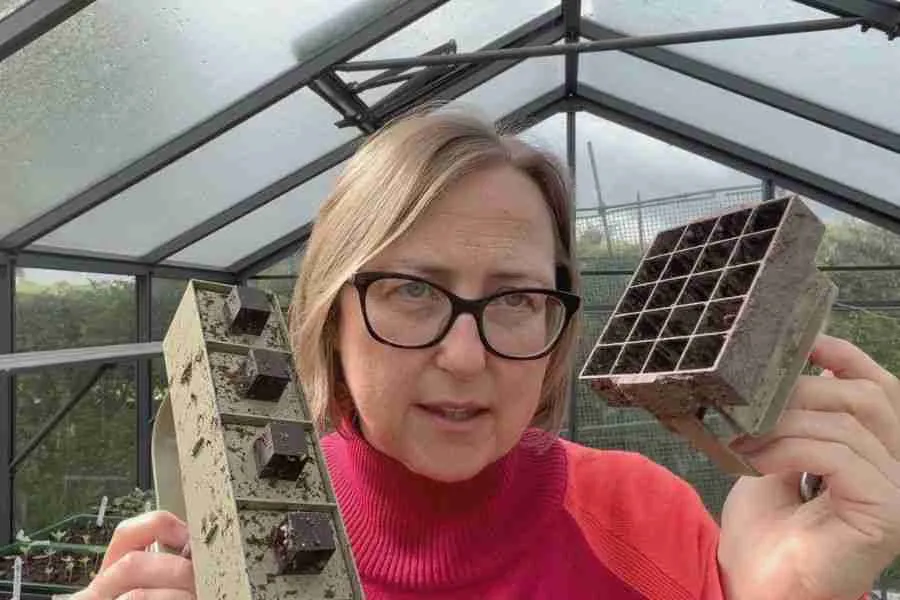
Tools required to create soil blocks
Creating soil blocks is a simple yet rewarding process that requires a few essential tools and materials.
The first tool you will need is a soil block maker (pictured above) specially designed to compress soil into cube-like shapes. This tool is essential for creating uniform and healthy soil blocks.
Next, you will need a special compost mix, which can be created by blending together various organic materials like compost, coconut coir, worm castings, and vermiculite. Here are the soil blocking mixes I have used. This mixture provides the essential nutrients that plants need to thrive. You can experiment with different ratios of the ingredients to find the mix that works best for your plants.
A scraper can be a helpful tool for levelling off the soil in the soil blocker and removing any excess soil. This tool ensures that the soil blocks are properly compacted, increasing the chances of successful germination. I use an old wallpaper scraper.
In addition, a tray or container is necessary to hold the soil blocks once they are made. This container should be large enough to accommodate all the soil blocks and should be placed in a warm and sunny location to promote germination.
Finally, covering the tray and soil blocks with reusable polythene bags can help create a humid and warm environment ideal for germination. This also protects the soil blocks from pests and adverse weather conditions. With these tools and materials, you can create healthy and sturdy plants using soil blocking.
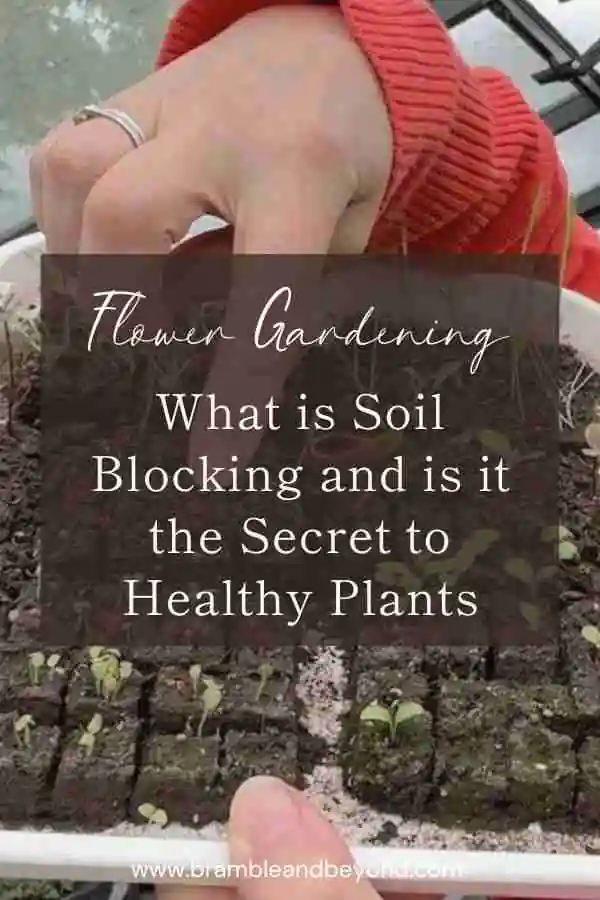
I initially used old plastic takeaway tubs to hold the blocks and the lid was perfect for creating the humid atmosphere. However, while this worked well, I found it much easier to create the soil blocks onto trays, several at once, like the top picture. I’m not sure why this should make a difference but it just seemed to speed up my soil block making process.
Step-by-step guide on how to create soil blocks
Soil blocking is an environmentally conscious and cost-effective way of starting plants, and it’s easy to make soil blocks with the right tools and materials. So after gathering the above materials, here is a step-by-step guide to creating soil blocks:
- Make the soil mix: Mix your preferred soil mix and blend with water until it is damp but not too wet. The soil should hold together when squeezed but crumble easily.
- Fill the soil blocker: Fill the soil blocker with the moist soil mix, pressing it in firmly to make sure all of the blocks are full with your soil mix.
- Scape off any excess compost: Using your scraper tool scrape off any excess soil mix so that the resultant soil block will sit level in the trays.
- Make the blocks: Press down the lever on the soil blocker to create individual soil blocks. Lift and gently tap the blocker to release the blocks onto your tray or container.
- Plant the seeds: Plant your seeds according to their recommended depth. Use the indentation the soil blocker tool creates in the centre of each soil block as a guide.
- Cover the soil blocks: Cover the soil block and tray with a clear, reusable plastic bag to keep the seeds moist and create a humid environment. This reduces the need for watering initially. Once the seeds germinate, remove the bag.
- Water the blocks: Water the soil blocks gently, being careful not to disturb the seeds. Keep the soil moist but not waterlogged. Placing the soil blocks onto a slightly larger tray and watering the tray rather than the soil blocks is easier. All the required water will be absorbed into the soil blocks within 15 minutes, and you can then remove any excess water from the tray.
With these simple steps, you can create soil blocks that will provide a healthy start for your plants.
However, even with the best soil mix and proper technique, soil blocking can sometimes present challenges. In the next section, we’ll cover some common issues that may arise and provide troubleshooting solutions.
Troubleshooting – soil blocking tips
With any gardening technique, there are always obstacles that may arise. Soil blocking is no exception. Here are some common issues and solutions for troubleshooting:
- Soil blocks falling apart: If your soil blocks are falling apart, it may be because the soil mix is too dry or too wet. Adjust accordingly by adding more water or allowing the mixture to dry out more before forming the blocks.
- Seedlings not sprouting: If your seeds aren’t germinating, it could be due to a few reasons. The soil mix may be too compact, preventing the seeds from getting the proper airflow and drainage they need. Or the temperature may be too low or too high. Check the seed packet for specific temperature requirements and adjust accordingly.
- Mould growth: Mould can sometimes develop on soil blocks if they’re too moist or need more airflow. Try increasing the air circulation or decreasing the amount of water you’re using to water the blocks.
- Slow growth: If your plants are growing slowly, it may be due to a lack of nutrients in the soil mix. Consider adding compost or organic fertiliser to give the plants the necessary nutrients.
By troubleshooting any issues that arise, you can ensure that your soil blocking technique successfully provides your plants with a healthy start.
In conclusion, soil blocking offers a simple yet effective solution for starting seeds and can lead to healthier plants.
If you want to find out more about soil blocking here are a few suggested articles:
- What is a soil block and is it the secret to healthy plants
- The surprising effect of different soil blocking mixes
- How to choose the right soil blocker
- Are soil blocks worth it? – Soil block versus seed trays
Happy gardening!

