Disclosure: This post may contain affiliate links, meaning I get commission if you decide to make a purchase through my links, at no cost to you. Please read my Affiliate Disclosure for more information.
Are you looking to add some stunning dahlias to your garden without breaking the bank? Look no further! Dahlia propagation is a technique which involves creating new dahlia plants from existing ones. It is an easy and cost-effective way to expand your collection. In this step-by-step guide, I’ll explain the different propagation techniques you can uses to duplicate your existing dahlias. So let’s dive in and get started!
The beauty and versatility of dahlias
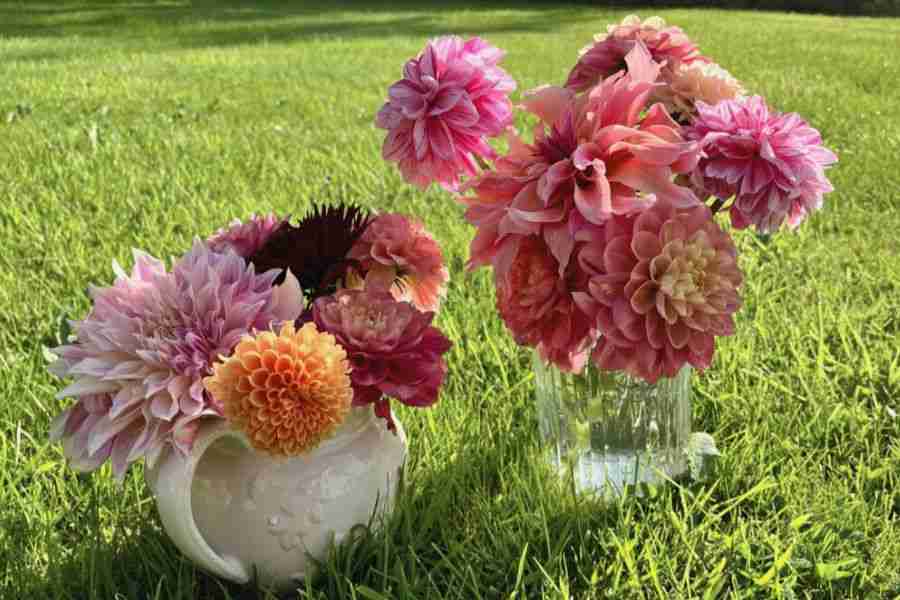
Dahlias are renowned for their variety and versatility. They come in an array of colours, sizes, and shapes, making them a fantastic choice for cut flower production. Additionally, dahlias are perennial plants, which means with the right care and maintenance they will regrow every year, getting bigger and more floriferous
Understanding dahlia propagation: The basics
Dahlia propagation involves three main techniques: taking cuttings, splitting the tuber, or saving and growing from seed. Each method has its benefits, and you can choose the one that best suits your gardening style and the resources you have at hand.
Dahlia propagation: Taking cuttings
Taking cuttings is probably the easiest dahlia propagation method. It involves removing new shoots from the tuber in spring and then allowing this cutting to grow roots. This method is relatively easy and can result in a new dahlia plant in a few weeks. Here’s the steps you need to take:
- If you potted up your dahlias earlier in the spring, you will soon notice some sprouts emerging. Once you see more than 5 new sprouts or stems, you can begin to take cuttings. Although, do be aware that if you have a young tuber, it may not grow that many, so you may need to wait to next year to propagate in these instances.
- Identify the stem you want to remove. It should have a small area of the tuber easily accessible as you will be removing this also. Make sure the stem has at least one set of leaves.
- Using a clean, sharp knife to cut the stem off close to the tuber, ideally taking a slither of the tuber with it (see image below). This helps increase the surface area for rooting.
- If you have it available, dip the bottom 1/2 inch of the cutting into a hormone rooting powder (on Amazon) before planting it in the container, although this is optional.
- Fill a pot with compost. create a hole down the edge of the container using a dibber or pencil and place the cutting into the hole and gently press the soil around the stem. By planting around the edges of the pot, you can get many cuttings in one pot.
- Water the pot and keep the pot in a warm, bright location and water regularly.

Once the cuttings have formed a reasonable amount of roots and are crowding each other out in the pot, then it is ok to pot them on into a bigger pot by themself. Then, you can plant them out in the garden in a few weeks.
By the end of the season, they will have formed a tuber like any other dahlia and will be able to be stored for winter.
I have also had success with simply placing the cutting into a jar of water, and potting the cutting up once the new root growth is visible.
If you want to see a video of me taking a cutting or read about this technique in more detail then check out this post: how to take a dahlia cutting.
Dahlia Propagation: Splitting the tuber
Splitting the tuber is another method of Dahlia propagation. This involves dividing the tuber (the root of the dahlia plant) into multiple parts, each of which can grow into a new plant.
Each potato shaped bulge on a dahlia tuber is a potential tuber in its own right. After a few years of growth a dahlia plant can have a large tuber system, which is worth splitting. All you need to ensure is that each new tuber created has a neck with an eye on it.
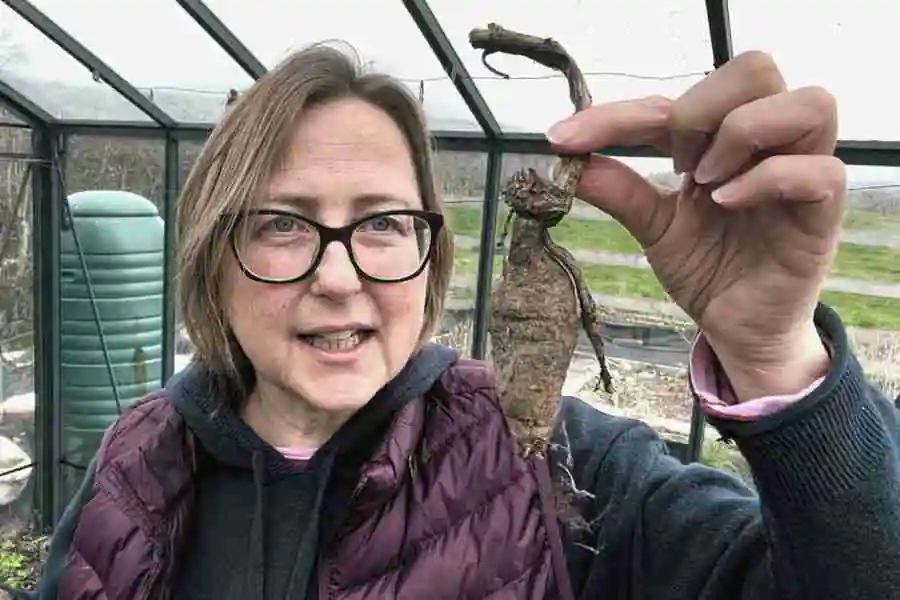
- Dahlia tubers can be split in either the autumn or spring. In the autumn, dig up the dahlia tuber after the plant has finished blooming and the leaves have turned yellow. Clean the tuber and leave to dry for a bit. In the spring, clean up the tuber and wait for the eyes to become visible.
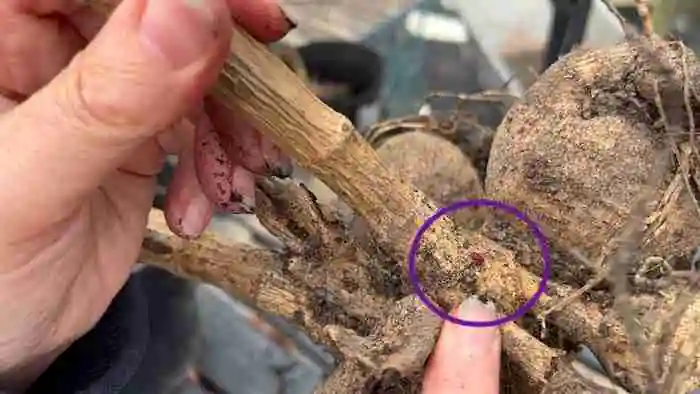
- Using a clean, sharp knife, cut the tuber bundle into pieces. Each piece should have at least one “eye”, the bud where a new plant will grow (shown in the image below). If you are doing this in the autumn, the existing stems should give you a good indication of where the eyes for next years growth will be.
- Allow the cut pieces to dry for a few days.
- If it is spring, pot the tuber into pots and continue growing the tuber in the normal fashion. If it is autumn, then protect the new tubers in the same way as you normally would to overwinter them.
Dahlia propagation: Saving and growing from seed
The third method of Dahlia propagation is saving and growing from seed. This is a bit more challenging than the other methods, but it can be a fun and rewarding project. However, there is a big caveat with this method – you cannot guarantee that the resulting dahlia will look like its parents. So as long as you are happy for the randomness of what could be produced and you are happy to accept the duds along with the beauties, then this is all you need to do:
- Don’t pick some of your dahlia flowers and just leave them to go to seed. This can take about 6 weeks for the flower heads to become pollinated and produce the seeds. It is easier for the bees to pollinate in dry conditions, however, you can self-pollinate the flower heads, but this is a bit tricky.
- Once the seed heads have been given enough time to fully develop, collect the seed heads. Initially store them in a cool, dry place to allow them to dry out.
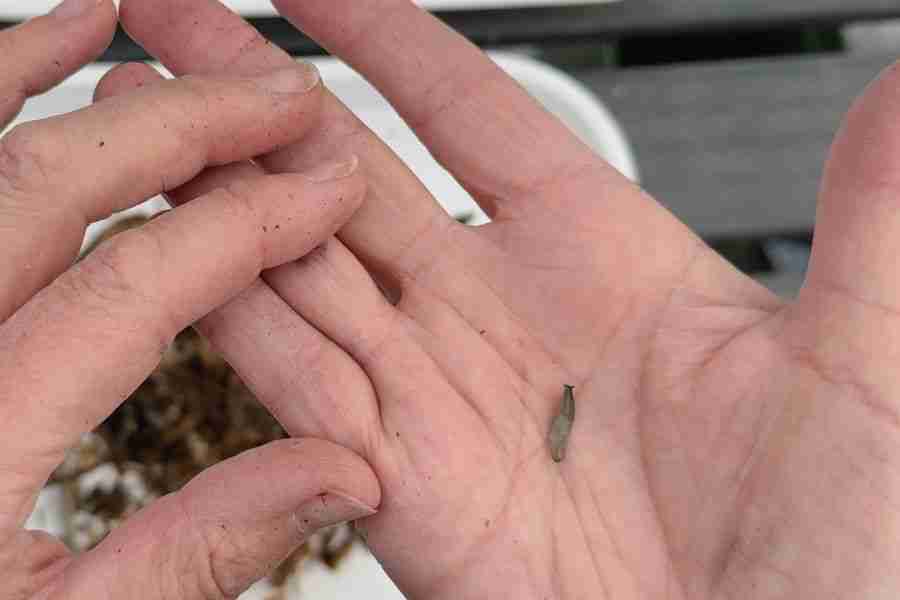
- Once the seed heads are dry, crumble them between your fingers and hunt out the seeds. The seeds will feel fairly plump and solid compared to the other plant material, see image below.
- Store whatever seeds you find in a cool dry place ready for planting in the spring.
The above steps are super simple to follow, and will create a completely new dahlia variety. You will not know what it will look like until it flowers. The surprise adds to the fun.
I will explain the finer nuances of creating new dahlia varieties from seed in more detail in another post.
The joy of dahlia propagation
Delving into dahlia propagation is such a satisfying journey! It’s not just about adding a splash of colour and variety to your garden – it’s also a fantastic way to embrace sustainable gardening. It’s truly a celebration of nature’s remarkable power to renew and thrive. So, why not give it a whirl? Your garden will be thrilled, and our planet will be too. Let’s not forget, each flower we nurture is a stride towards a more lush and eco-friendly world. So go on, spread those dahlias around, and let’s revel in the delight of gardening sustainably, hand in hand.
Tips for growing your dahlias
- Divide your dahlias: To produce good sized productive dahlia plants, it is a good idea to divide the tuber every few years. If the tuber is too large, then you get increasing amount of foliage and poorer quality blooms.
- Starting your dahlias: From March onwards you can start your dahlias tubers growing in pots in a protected growing space. The space doesn’t need to be heated, but it does need to have light and be protected from frost.
- Propagate your dahlias: Once your potted up dahlias start producing more than 5 new shoots you can take cuttings of any of the extra cuttings, to create new plants that will flower and create a tuber within this growing season.
- Pinch out shoots: Once you have stems that have a few sets of leaves, then pinch out the growing tip. This will encourage the plant to produce more lateral growth and flowering stems.
- Planting: When planting your dahlias, plant out the plants deep enough to cover the tuber. Place the tubers about 15cm (6 inches) deep. Space the tubers/plants about 40cm – 70cm apart. Only plant out once the risk of frost has passed. In the UK this is generally mid May.
- Watering: After planting, water them in well. After the initial watering, I prefer to water all my plants (if I need to water) with a long deep drink, rather than a light consistent watering. I think this encourages the plants to go in search of their own water, making them more drought tolerant.
- Provide support: Dahlias, especially tall varieties, will need staking or other support to prevent them from toppling over under the weight of their blooms. It is best to get this in place before you need it, rather than waiting until it is too late.
- Protect from pests: Avoid chemical pesticides in your dahlia bed. Instead, encourage beneficial insects, try companion planting, use physical barriers, or try homemade, eco-friendly sprays.
- Protect from frost: In the autumn, after the first frost, either cut back your dahlias and mulch heavily to protect the tubers over the winter. Or lift them and store them somewhere cool and dry overwinter.

